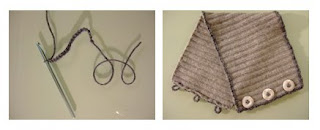
The San Francisco Bay Area is unseasonably cold during the summer months - instead basking in warmth during the Spring and Fall seasons. So, because of the chilly weather of late, I thought about a project I did a while ago that I love, but have yet to share.
I bought the most beautiful Angora wool turtle neck sweater last year at the thrift store and wouldn't you know it, the very first time I washed it (before I wore it) I shrunk it!?! I was so upset, even though I had only spent $7.00 on it. I have never been able to afford real Angora before and this sweater was so nice, so I was heart broken. But I was determined to not let it be a total waste. I decided it was perfect for turning into a cozy neck warmer!
I've made a few of these in the past, but they've always been knitted and crocheted, and always gifts for friends and loved ones.

I figured since it was Angora wool and I had effectively "felted" the material by washing it, so it wasn't going to un-wind if I cut it. So, here goes....
Super Easy, Up-cycled Angora Neck Warmer
Materials:
-old turtleneck sweater made of wool, already shrunk or pre-shrunk
-scissors
-crochet needle
-yarn
-needle and thread
- buttons
Time: Depending on how quickly you crochet and sew, this can be an hour long project.
1. If you have an old, unwearable wool sweater and it's not yet shrunken, wash it in the hottest water setting possible on your washing machine. Make sure to utilize the energy and water you're using running a hot wash cycle by throwing in some other things that would BENEFIT from the hot wash - effectively killing two birds with one stone.
2. Once the sweater is dry, very carefully cut the neck off of the sweater, keeping as close to the seam as possible. Then, cut the turtle neck in half, top to bottom, creating the "seam" you'll use for the opening of the neck warmer.
3. Chain stitch your yarn, checking regularly to make sure it is the length of the entire border of the turtleneck. Be sure to chain stitch some extra length for your button loops.

4. Use a large-eyed needle to sew the chain stitched yarn onto the entire outside border of the turtleneck, using the same yarn, which effectively "hides" these stitches. When you get to the front of the opening, where you'll eventually sew on buttons, sew loops into your border that will fit over your buttons.
5. Sew the buttons on to the opposite side of the opening that you stitched the loops on to. Make sure to line up the buttons to the loops so they are even when you are wearing your neck warmer.
6. You're done!
 Enjoy the coziness!
You didn't think I was going to waste the rest of the sweater did you? ;) Stay tuned, I'm either going to create a trim for that and turn it into a sweater for one of my toothpick-thin friends (hee hee) or I'll make it into the softest pillow ever adorned with crewl work, which I've always wanted to learn how to do.

No comments:
Post a Comment